As of recently, The Victor Voice has been getting reworked in a lot of ways. Coming with the studio, some episodes are ending with this slick new outro created by yours truly, in which one of the episode creators from the episode draws out a V similar to the iconic Disney channel bumpers that would play between shows.
Because of how complicated this process is, I decided I would write down how exactly I make these.
Get the Ingredients Ready
Setting up the process of creating these outros is a step within itself, I usually get out which clip I want to use and then go onto a random online converter to turn that video file into a gif file. This is important as gif files turn every frame of the video into a bunch of images (which is why the file size for most of these gifs are almost in the hundreds of megabytes).

The next important step is bringing out my pixel art software “Libresprite” which is the free version of Aseprite. The Computers at this school don’t usually like it when I try to download it, but it’s possible to get working. After the gif file is ready, I bring up Libresprite, put the gif into the application, and make a new layer to start drawing in.
Draw and Erase the Path

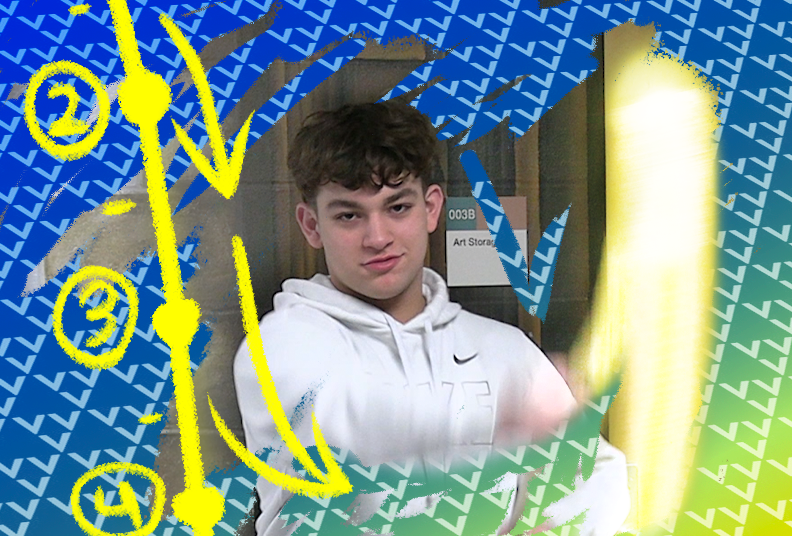
With this newly created layer, I link the frames between when the trident starts and ends swinging, I then dot out the path in which the trident is swung in so I can then use the curve tool to make a smooth path.
From here I unlink all the frames to make it so every frame while the trident is being swung, can be altered instead of it affecting all of the frames. Once I’m ready, I’ll go to every frame and erase the line depending on where the trident is in the frame. By the end of the animation, it looks like a smooth path is being drawn to form a big yellow “V”.
Spraying with the Spray Tool

From here there are two things I need to focus on; Making the base animation for when the V is tapped on, and having a white spraying effect around the V. I start by finding where the V is pushed on and look for a good spot where it can go to be looped; Then I draw it and messily draw the V across several frames so i can copy it in which it loops with a jitter-like fire effect.
For the white spraying effect, I create a new layer on top of both layers. With this new layer, I change my color to white and then spray on all the frames until the V loops at the end. I typically spray where the trident is drawing in a specific frame, and I spray white all over the V when it is being tapped on.
At this point, the gif file is ready to export, so I turn the background transparent (make sure the color mode is RGB and not indexed) and if all goes well, the file will be able to be put in Adobe Premiere Pro and be synced up above the original video with little adjustments.
Polishing and finishing up the details
After the gif is put two layers above the video layer, I duplicate the gif files into two layers and apply a filter to each of them. Then, I get out some assets I created to use for these outros in the diagram shown below. The assets include the outro music, the brush & fire SFX, the background gradient on the credits, the animated V layer, the Victor Voice logo on the top left, and finally the string of credits.
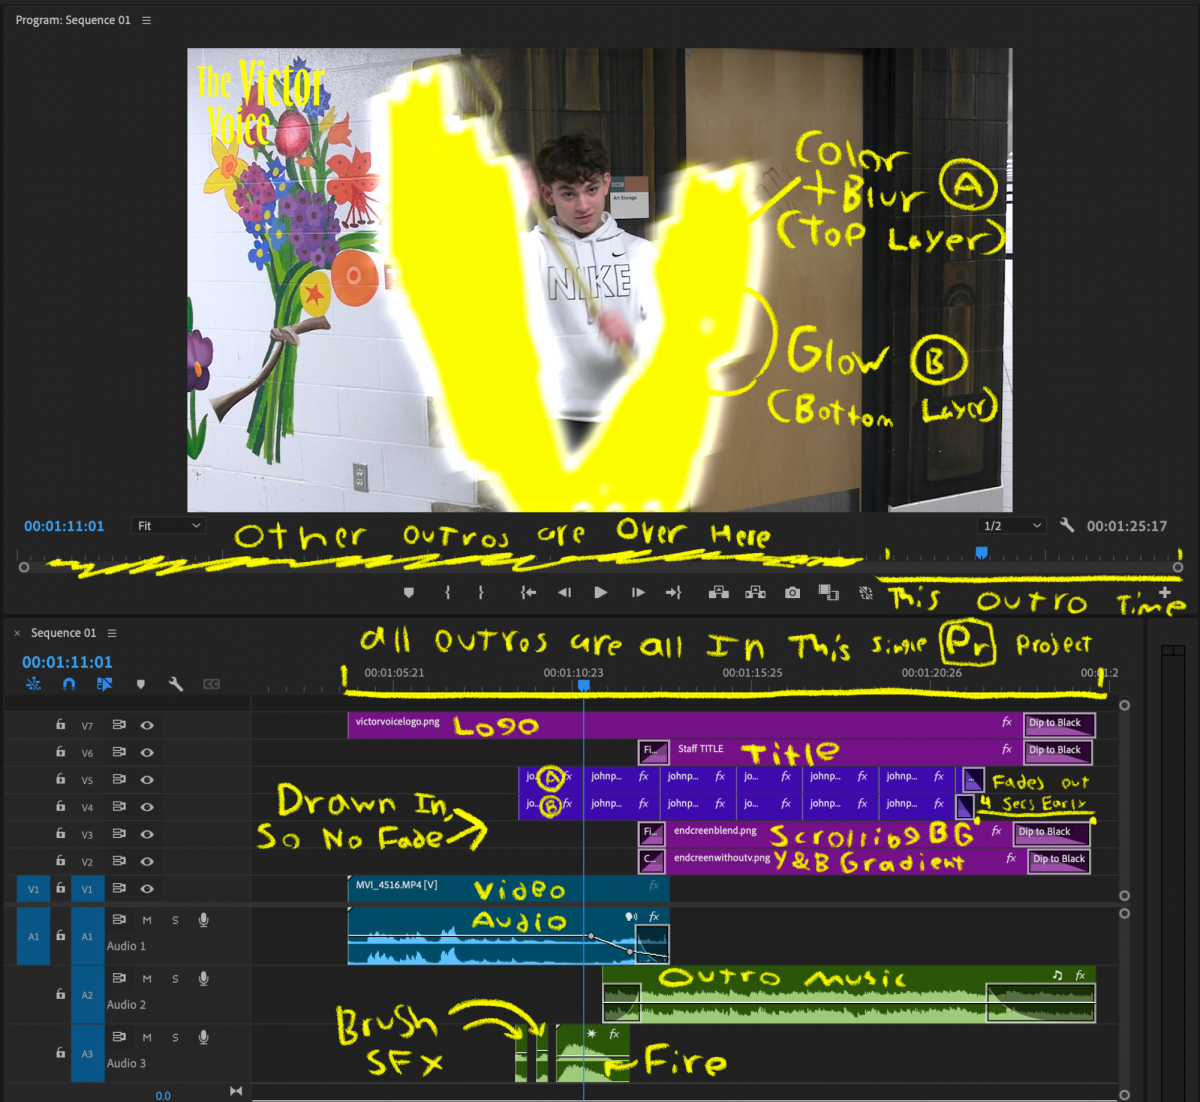
This is what each outro looks like inside the project (minus the notations), As I am writing this, there have only been four outros created. This may look overly complicated, but a lot of the stuff going on is quite self-explanatory. The sound effects all come from Bensound, I fit the first brush sound when the first half of the V is being drawn, then I do the same for the second sound, ending off by placing the fire a little bit before the V combusts. The music for all of these outros is the end of the song “Seeds in the Sky” from Storyblocks; I wanted to use it after it was used in the New Studio episode.
 As for the background, How it works is that there is a blue-yellow gradient below an overlayed pattern of Vs that is scrolling to the right while zooming out. I got this effect by making the pattern two colors, then turning the blend mode on soft light after I keyframed the zoom and position of the image to scroll. The Victor Voice logo on the top left of the screen is directly based on the original credits scene created by my brother two years ago. Finally, the text for the credits is a .mogrt file that comes with three titles to credit the creators of the episode.
After all is said and done, I export that section of the project to give the creator of the episode so they can plop it down at the end of their episode. These outros may seem like a tedious task to create, but it can be easy and quite fun to get creative. If you have any questions about these outros, either comment on this article or email me; I’m Jonah Iwankow with the Victor Voice, signing off.